How to Plan Area in AUTOCAD?
- ADMEC Rohini

- Dec 11, 2018
- 4 min read

This blog is all about AutoCAD which is one of the best drafting software in the world. I’m going to cover the process of plan creation in very simple steps. Preparing a draft of any plan is not an easy task. But when you know the simple and effective steps then this work can become a fascinating and calm work. But before we go ahead and start our discussion on plan creation, I would like to throw some light on an overview of this amazing drafting application. So, Let’s get started.
Few Essential Points About AutoCAD:
AutoCAD was developed by Autodesk.
It stands for Autodesk’s computer aided design. It’s a drafting and designing software being used worldwide.
It works on co-ordinate system.
It is used for 2d and 3D design, mostly for civil, mechanical & architecture.
It is very popular among small to large scale companies.
It makes drawing and drafting very easy and handy work.
It is cost effective and highly affordable.
Due to its popularity there is a huge demand for skilled AutoCAD employees in the industry. But to be a professional you need to get trained by joining professional AutoCAD course in Delhi from any renowned training institute.
What is a Floor Plan?

Here is your answer:
It is a diagram of a building with top view
It consists of measurements, furniture, appliances, or anything else which is essential in plan.
Floor plans helps in designing furniture layout, electrical installation, and planning of an area.
It also consists of other architectural features like fireplaces, shelves and benches.
Placement of staircases.
It has walls, windows and doors.
Importance of Floor Plan Design
Floor plan is used to communicate your idea in the form of a layout. A good floor plan is a plan that gives a proper flow between spaces to make the movement of a person easy and comfortable.

Key Characteristics of a Good Floor Plan When Designing Any House
Versatile and flexible: Always make sure in future an office can easily be turned into a child's bedroom whether for your family or a future buyer’s. A room can be used in various ways in future.
Size matters: Always think about the number of people using that space at one time, whenever designing any room or hallway.
Have efficient circulation and storage.
Have natural lighting and good ventilation system according to the sun and wind orientation.
Having windows in the plan help in balancing daylight and making room spacious.
Maximum use of available spaces is highly recommended.
Good and easy circulation of the spaces designed for the client.
How to Draw a Floor Plan?
Choose an area: Specify the area to be drawn. Prepare a design based on the size and shape of the location on which to build.
Measurements: Do proper dimensioning and measurement of the walls, doors, furniture so that the floor plan will be accurate.
Walls: Draw separate walls for each room of the building.
Architectural features: Add architectural features like doors, windows, ventilation and other important things like refrigerator, washing machine, dishwasher, WC, wash basin etc.
Furniture: Furniture can also be added as per the demand of plan.

How to Plan Area in AutoCAD?
Any drawing is an accumulation of ideas put into written form when we receive them from the customer. Questions come to us in many shapes, like what is the number of rooms in the house? How many people will utilize the dwelling or what is the workflow that will exist in the structure?
First, we prepare a rough sketch according to the need of the client.

Creating a Drawing Using the AutoCAD then, we select our architectural template, Units, Dimension Style, Line scale and other specific variables.
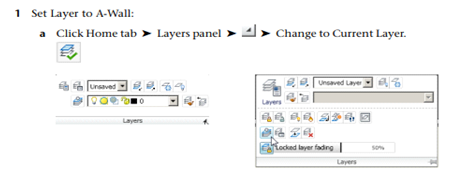
After that we create different layers for walls windows, doors and others that are required.

Almost all drawings need to begin with the same approach, so in the floor plan, the perimeter of the proposed house is made first.

Draw Interior Walls 1. With the offset command draw internal walls. 2. Mention offset distance. 3. Now, you need to select internal line of recent drawn wall then click to offset the line option by moving towards center of the plan. 4. Replicate the offset command once again. 5. Repeat the above steps to mark offset of the internal wall. 6. Now, join the new lines together, you can take help from the below given image.

7. With the help of Trim tool. Trim the extended or excess linesat intersection of walls to get finished wall placement.

Placement of Doors and Windows
1. Draw using line and arc command according to the width of door.

2. Repeat the above commands to draw doors with required width. 3. With the help of Trim tool clean up the extra line of doors that are intersecting the walls.

4. With the help of offset tool make Windows by offsetting the walls to the required window width. 5. Trim the extra extended window lines. 6. At the end, add door and room tags with the help of text command. So, finally, we have designed a plan in AutoCAD. Wasn’t difficult? Well I don’t think so and I’m sure you too. Now it’s your turn to design a home plan or any other type of plan in this drafting application. I hope you won’t find any trouble while creating, and don’t worry if you’ll find any issue. Just read this blog once again or leave your issue in below given comment area.
Author Introduction: This blog is written by Priya Bhatnagar pursuing Architect Interior Premium course from ADMEC which is an education partner of CAD Training Institute.
Source URL: https://admec-multimedia-institute.blogspot.com/2018/12/how-to-plan-area-in-autocad.html


Comments